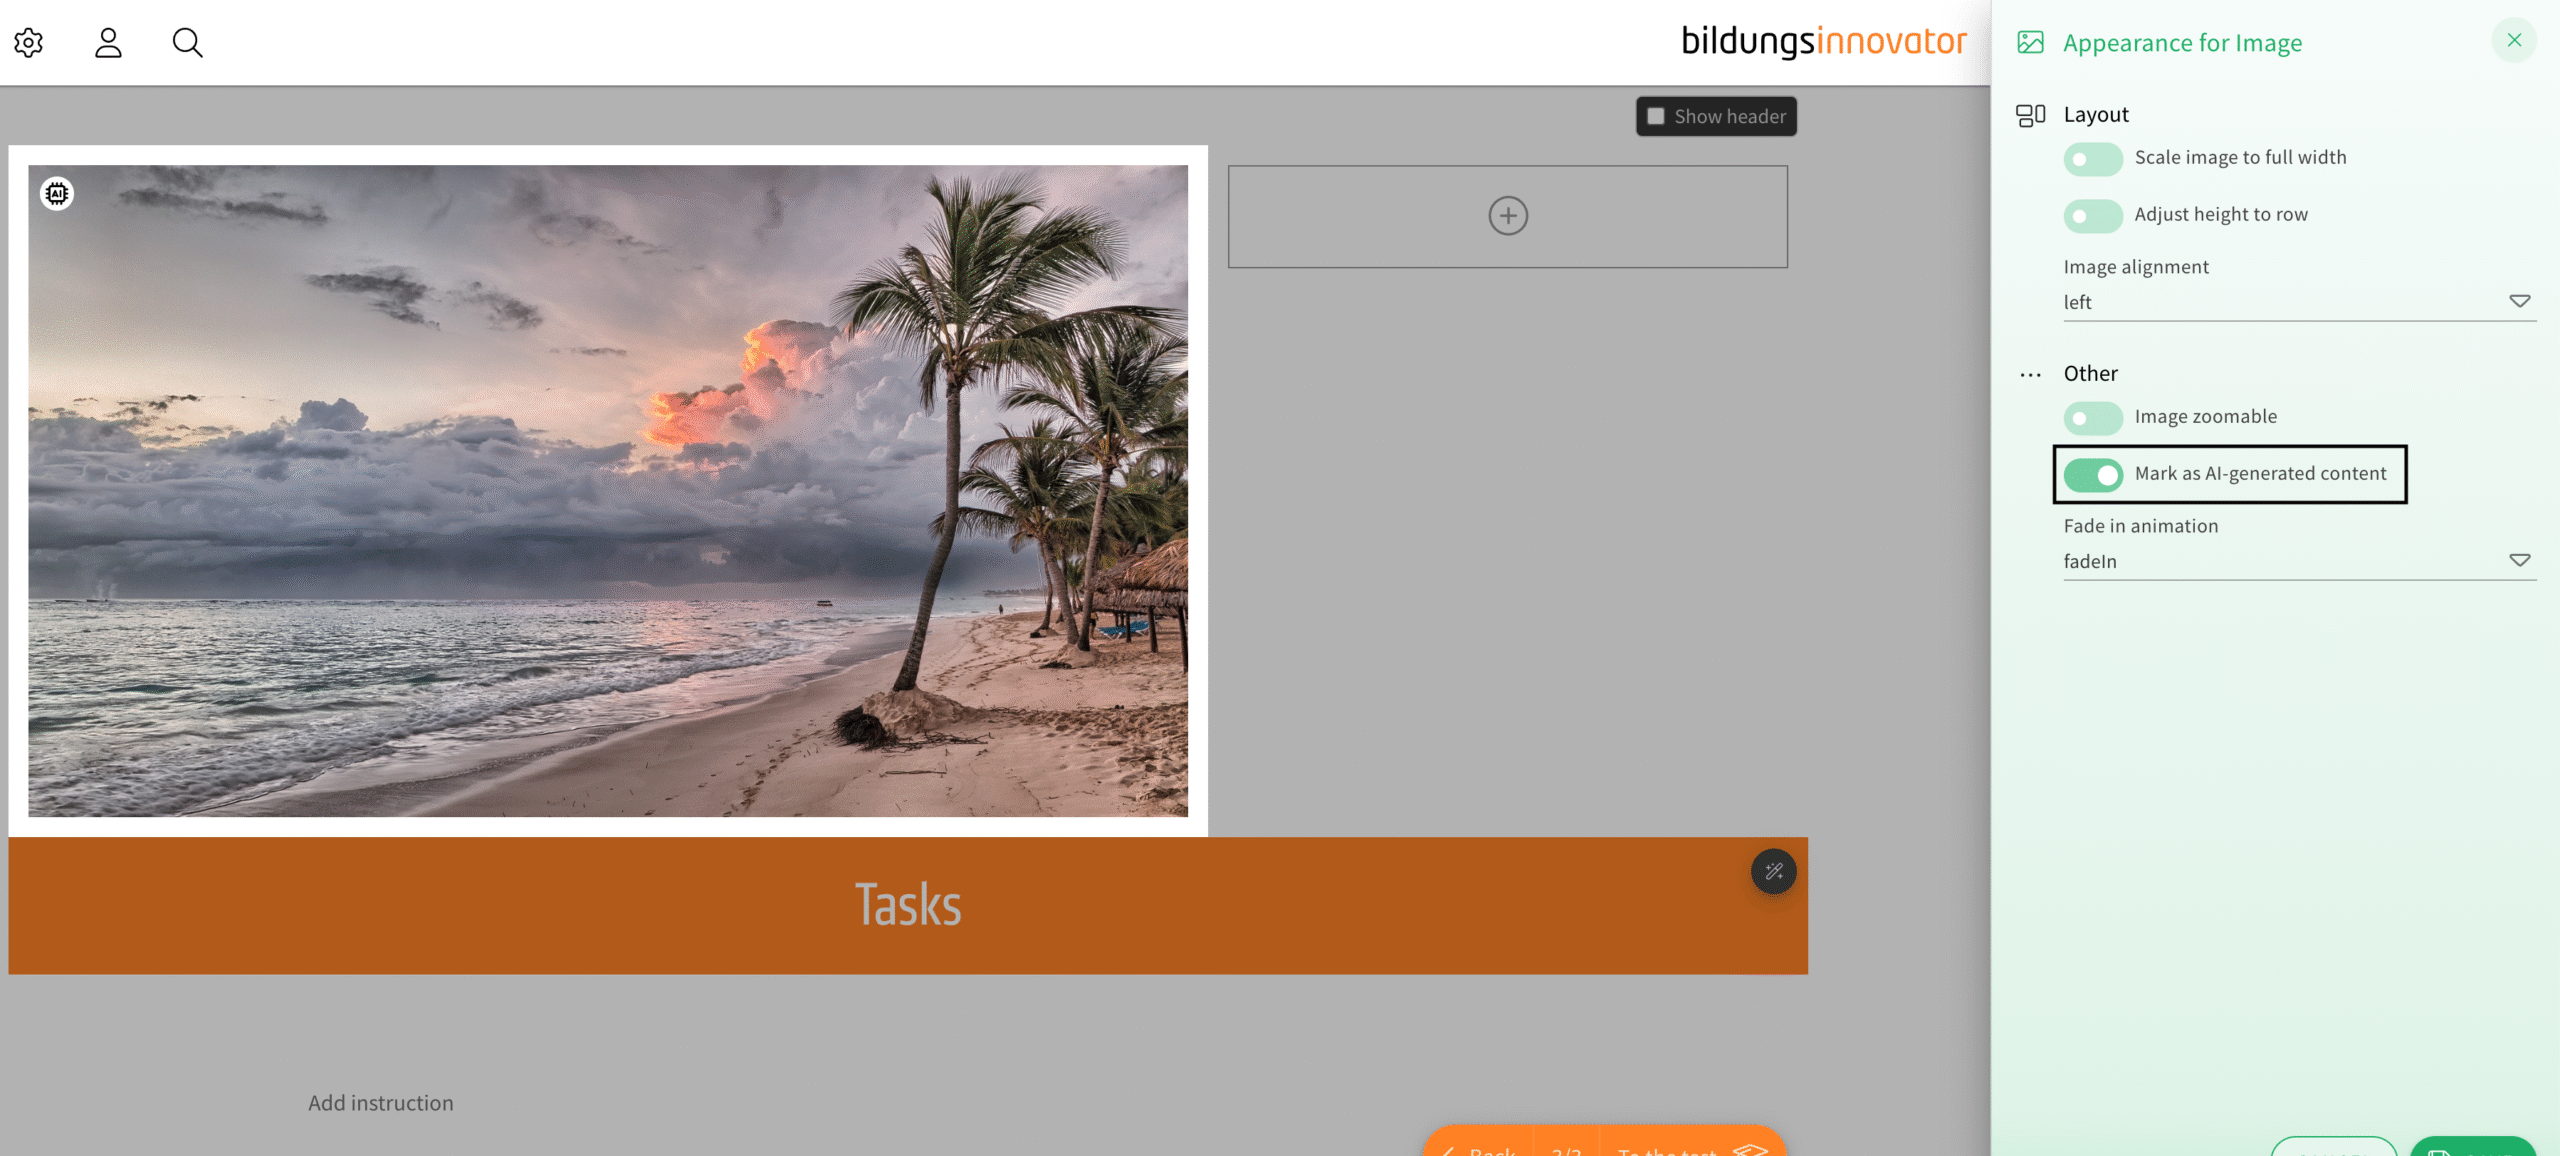
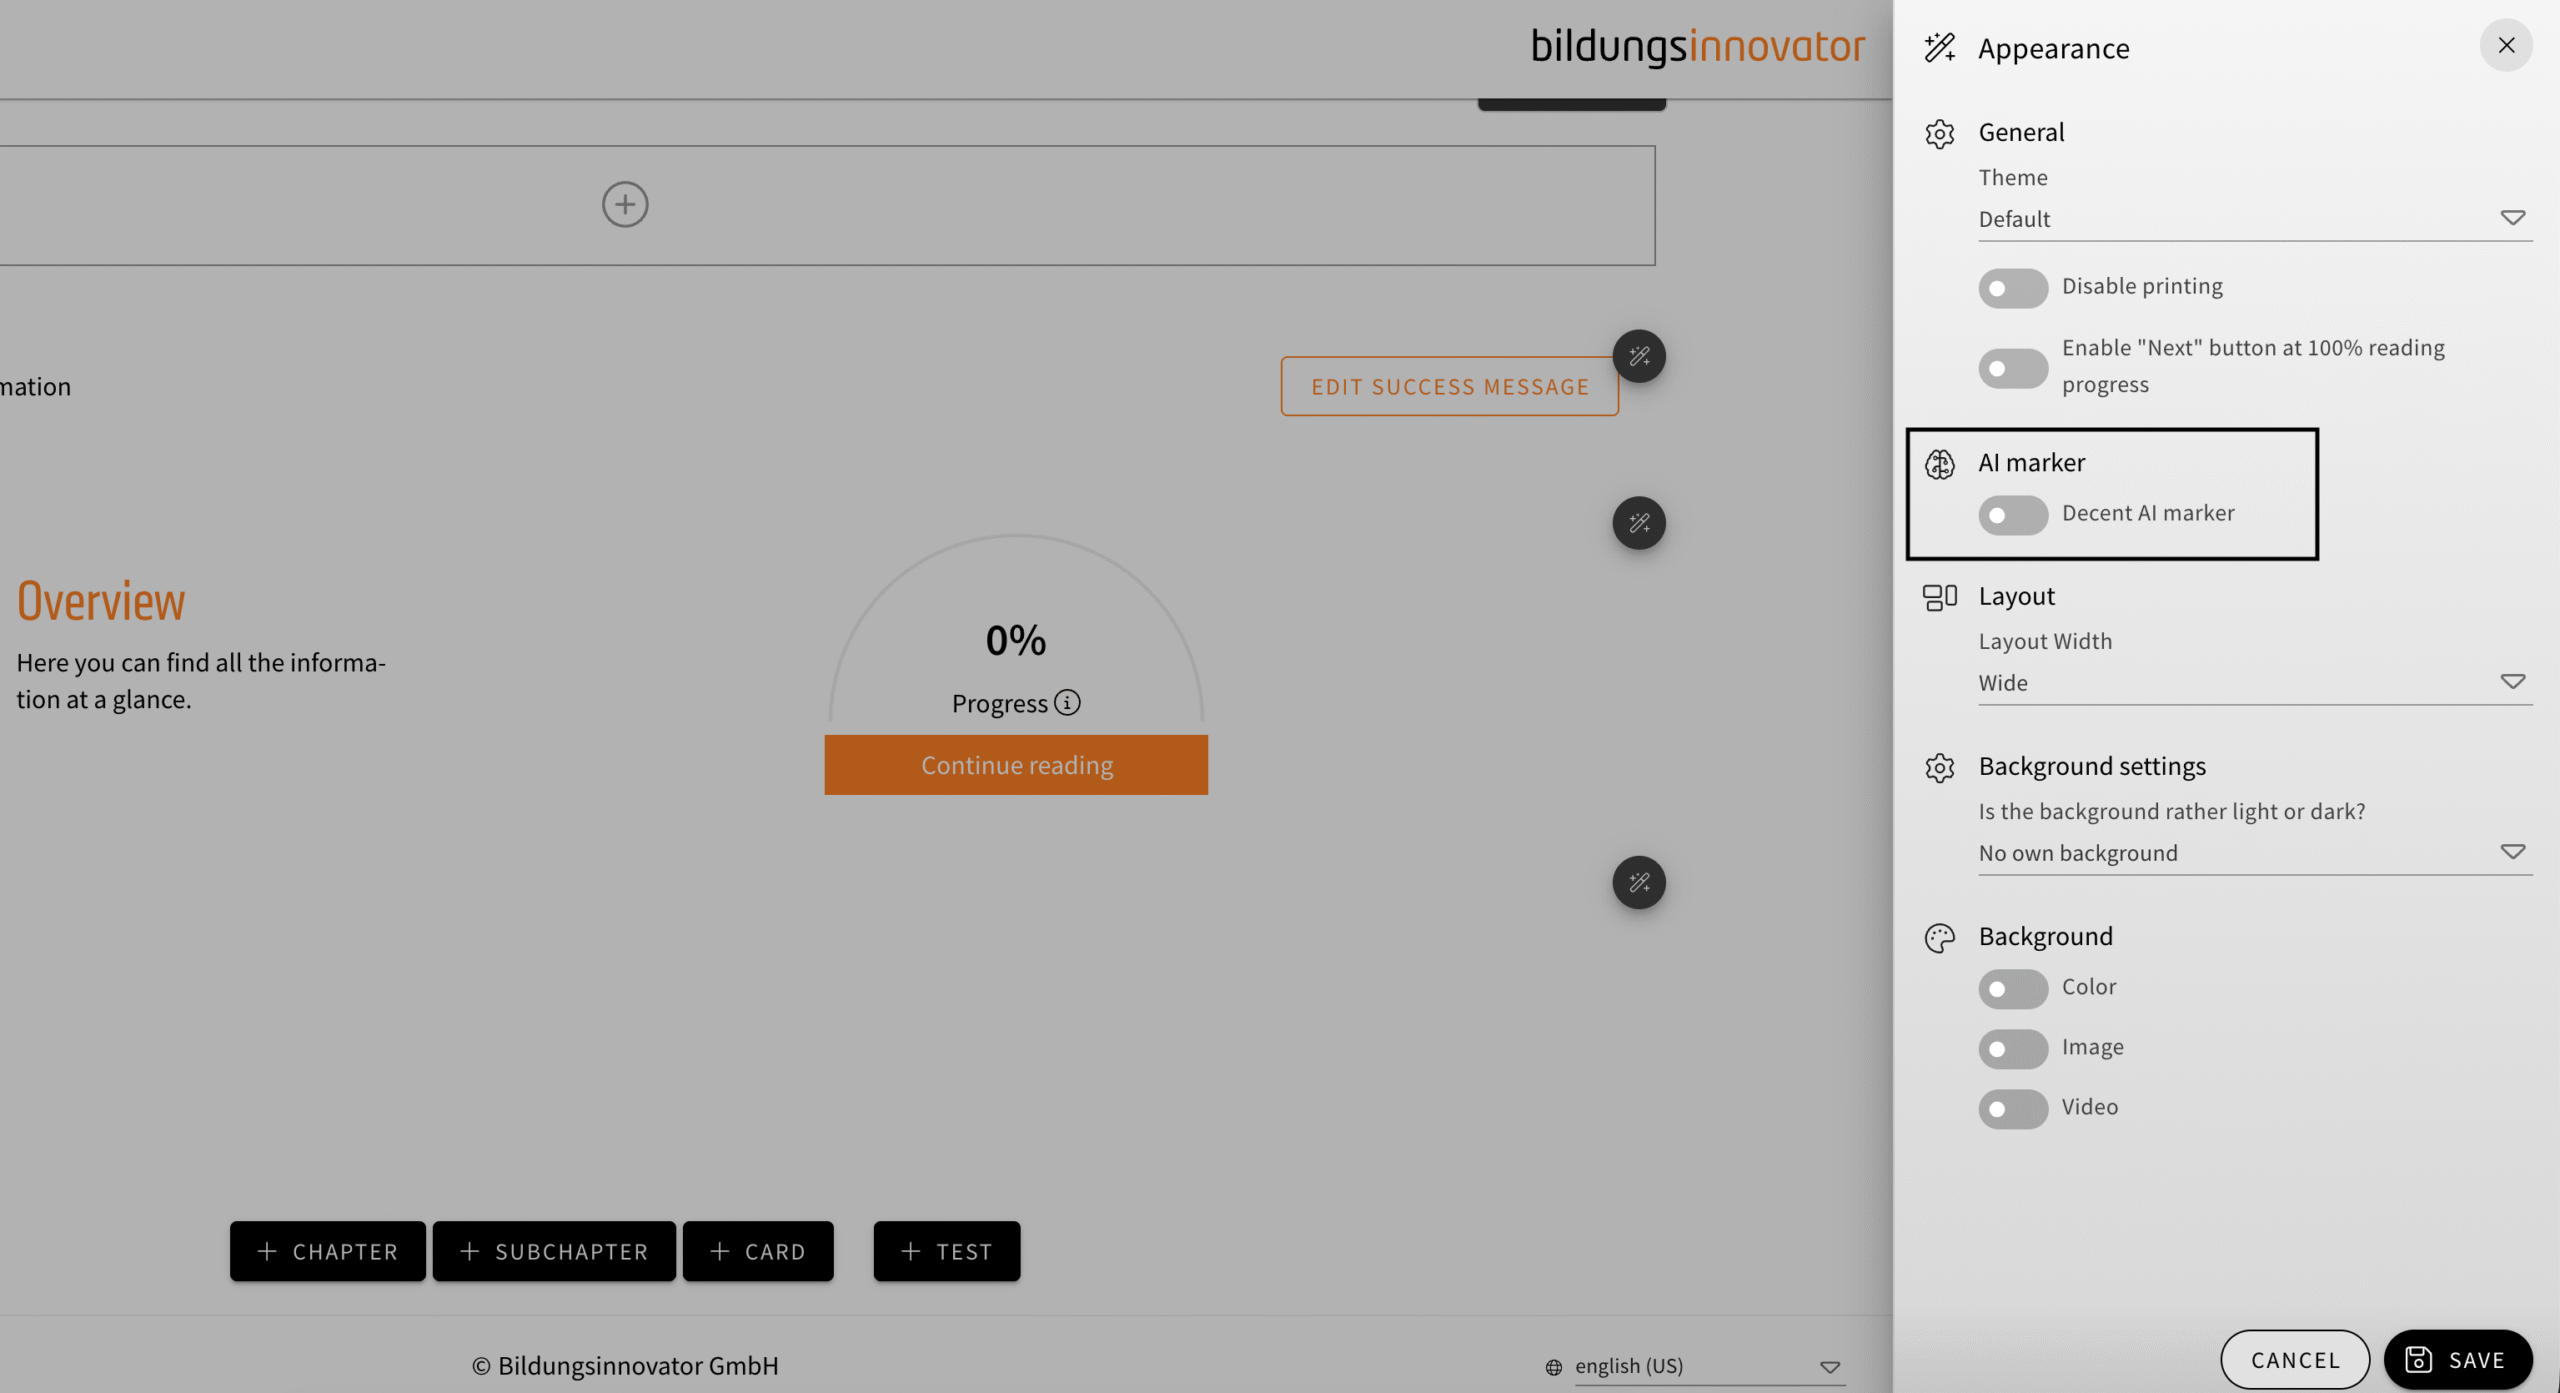
The AI marker is now more customizable. With the changes, you will now be able to choose one of four color options in a drop-down menu for the AI marker and choose its position in images and expandable images between their four corners. An option to choose when the marker is visible to the user is another addition to the new customizable options. The AI marker itself was introduced in a changelog in the past.
How does it work?
The AI marker now has its own category inside the appearance menu of an element. The first appearance option „default“ can be an appearance of your choosing if you provide us with the necessary custom SVG marker. Using an icon you provided us with, we can implement it in your theming so you can use this option to its fullest.
The next color option uses your primary color for the AI marker, and the ones after that are options for the label to be black on white and white on black in turn. The images and expandable images have an additional drop-down menu as well, in which you can also decide in which corner the AI marker is shown.
In the overview of an online training, you can also use the new toggle to decide if the user sees the AI marker for all elements always, which is the default option, or if it’s only visible when the user has the actual element at the center of the screen. That way, authors can avoid too much clutter at once on users‘ screens.
The AI marker is usable in the following elements:
| Text elements |
| Image elements (additional positioning options available) |
| Expandable image elements (additional positioning options available) |
| Video/Audio elements |
| Choice text quizzes |
| Date input quizzes |
| Order quizzes |
| Relation quizzes |
| Value input quizzes |
| Value slider quizzes |